Fireball Air Cannon
Overview:
Tiz the season for burning projects. With this in mind I wanted to build my personal variant of the popular propane based fire popper. The problem with propane is it always burns with a very bright orange fireball. I love pyro chemistry, and specifically coloring agents. So the natural progression would be to make giant brilliantly colored fireballs. To accomplish this I designed an air cannon that is alcohol based so that you have a neutral base that can be augmented in very much the same way a poi spinner can color there poi. The end result is giant fireballs of red, blue, green and purple!
Disclaimer:
This build is not for the casual or haphazard inventor. This project is inherently dangerous. DO NOT DO THIS PROJECT – unless you know what you are doing. We are not responsible for any damage to self or property you may cause with the information found in this article.
The Air Tank:
Here we have the main component of our air cannon, the 5 Gallon Portable Air Tank from harbor freight. This is the core component for our build. The reason we are using this tank is there is no modifications required to the tank its self for this project. It uses a 1/2 inch course threaded fixture that is the same as standard plumbing parts. We also are using 1/2 inch so we can get rapid discharge from the tank. This will cost you about $19.00
The Air Valve:
For this project we are using a 1/2 inch 12V solenoid valve that is used on car suspensions or air horns. This type of valve only works in one direction so it is important to note the direction it is oriented when it is installed. We picked this up for $22.00 on ebay.
Plumbing Nipple:
For this project we used four 1/2 inch steel plumbing nipples. These will cost you about $1.25 each.
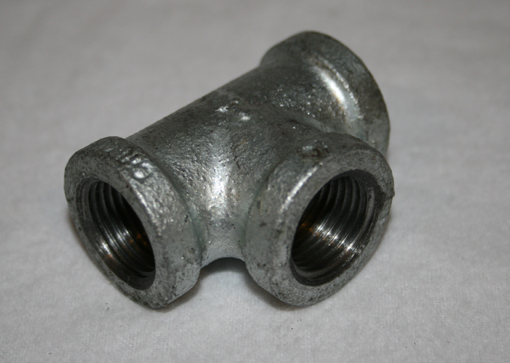
Plumbing “T”:
For this project we will use one 1/2 inch steel plumbing “T”. These will cost you about $2.50 each. This allows us to reuse the fixtures on the tank to fill the tank with ease.
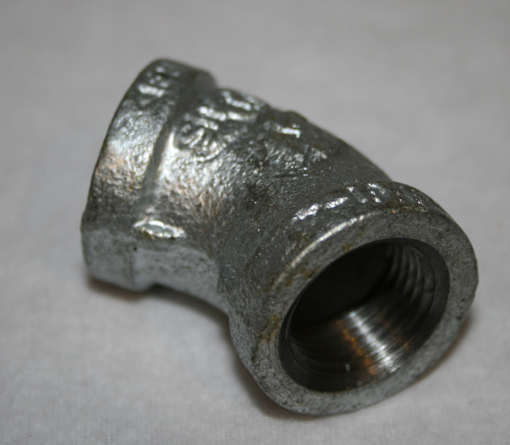
45 Degree Elbow:
Ok, so this is a bit on the optional side of things… If you want the cannon to point 45 degrees out by default don’t use this. If you want it to shoot straight up (I recommend for effect) then use this to correct the alignment. It will cost you about $1.50
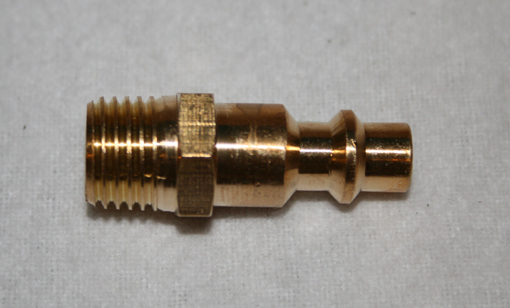
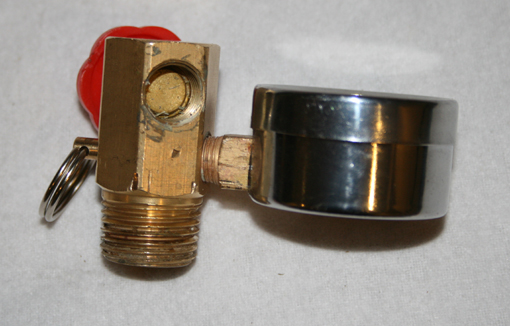
Air Compressor Nipple :
So once we remove the hose from the tank we can install this 1/4th inch standard compressed air fitting to allow our quick connection fill hose to the tank. Again the harbor freight tank provides us with tremendous ease on this connection. This will cost you about $2.00
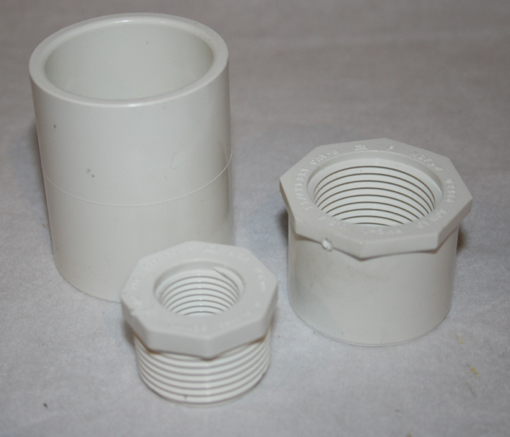
PVC Fittings:
So I wanted an easy to modify setup for my cannons barrel, so I chose to use PVC. It’s easy to replace and cheap to replace as well. Here we have some simple reducers and a connector piece used to join pipes together. We end up with a 1-1/4 diameter barrel on the cannon. You can adjust the length of PVC and air pressure to shoot a larger fireball. This will cost a minumum of $3.50
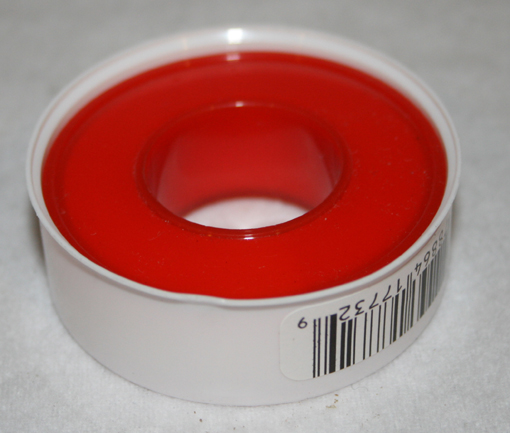
Teflon Tape:
Finaly we have a very important component to the build. Teflon tape provides us with 2 benefits. First it makes an air tight seal between our pipe fittings. Secondly it will help us easly disassyemble our fittings if needs be for maintainance. Don’t skip this $1.00 step
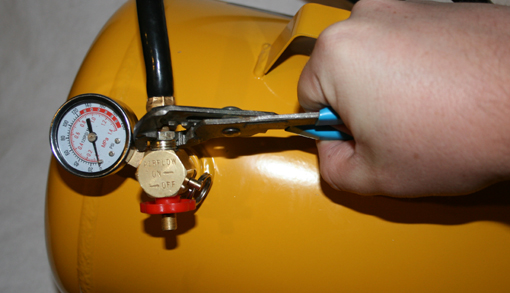
Step one of disassembly will be the removal of the air hose from the tank valve. This we will not use in our build and it can be trashed.

With the hose removed we can see that we can now get a wrench or a socket securely over the fitting still attached to the tank.
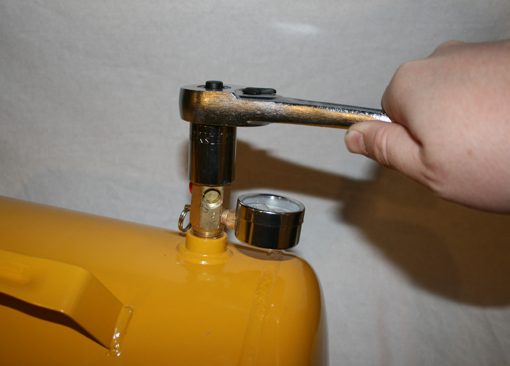
Using your socket set or a hand wrench very carefully remove the fitting from the tank. Take special attention to the hole where the hose was set if you use a hand wrench so you don’t mess up the threads.
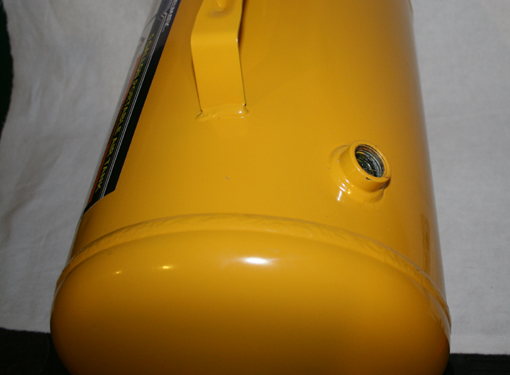
Here we can see the fitting removed from the tank. At this point inspect and clean the threads of the glue they used with a wire brush.
Step one on assembly is to gently clean the threads on the fitting with a wire brush. Once clean screw in the air compressor fitting in the hose hole and then screw the fitting into the middle of the “T” fitting.
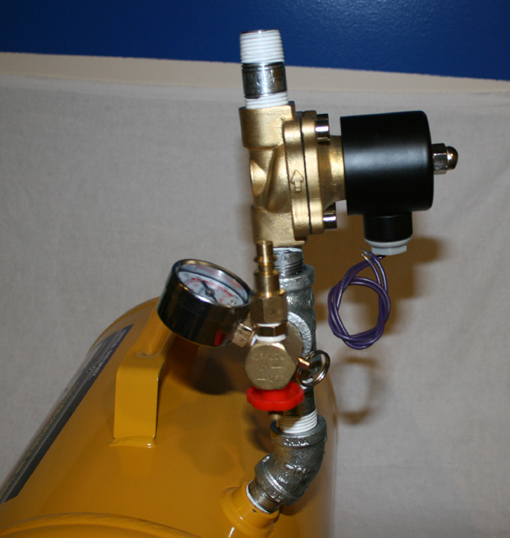
Here we have a side view of how this should be assembled. You can see that we used our 45 degree elbow to keep our cannon shooting straight up. Note the arrow on the side of our air valve!
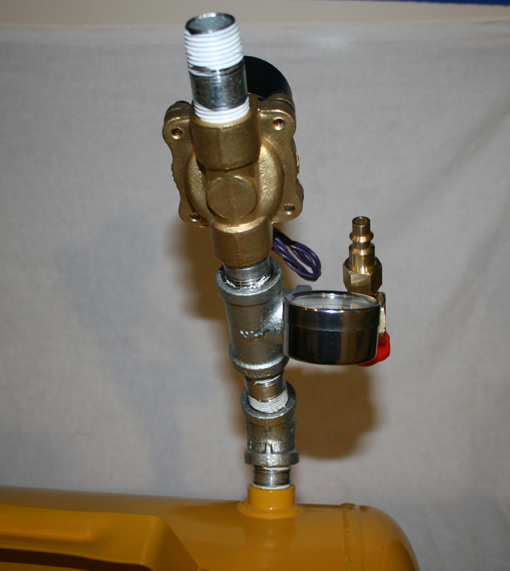
This view of the back of the fitting assembly we can easily see how the pipes are connected.
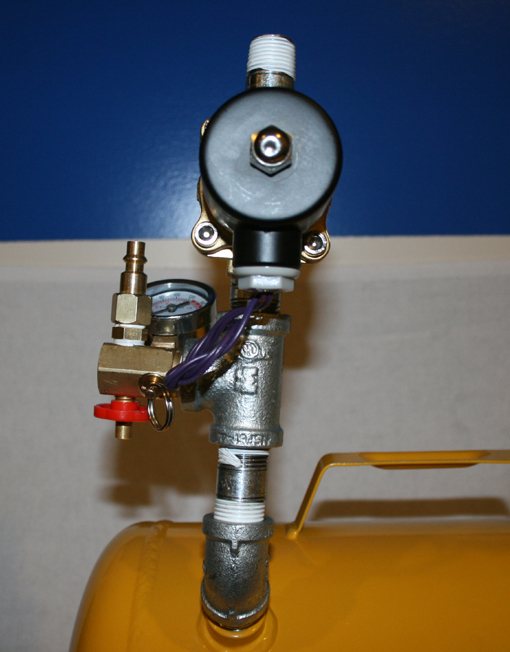
This front view gives a great view of the final modified valve fitting originally on the tank.
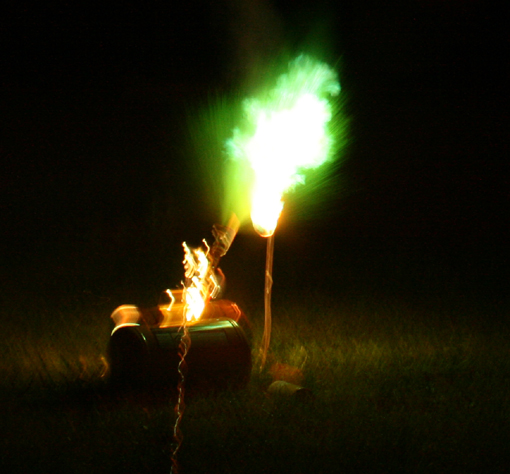
So here we have my second attempt at shooting the cannon. We are using a tank of gas with a torch tip that has been modified with a short length of copper tube as a pilot light. I also have a smallish back yard so I am only shooting 2 ounces from a short barrel for each shot, though at 60 lbs it will shoot up to a gallon of fuel. In this shot I used some copper chloride II to color the fire with green and blues. I purchased my copper chloride from skylighter.com because they have been around for years and I highly recommend them having worked with them for some time.
Here you can see the blues and greens in the fireball. This is very hard to capture with video or a camera, but the colors are very vivid!
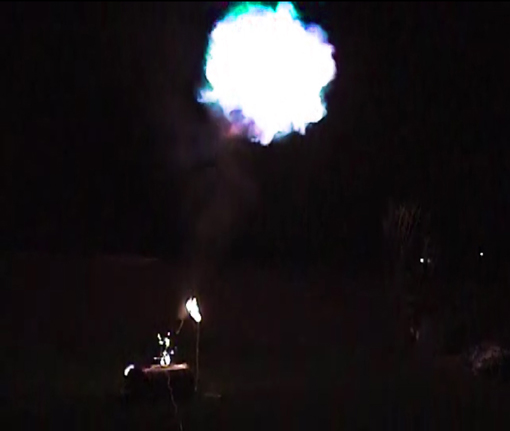
Our first test shot of the fire cannon. For this shot we dissolved some Lithium Chloride in with our alcohol to produce a deep crimson red fireball.
Here we have a short how to for making our copper solution and test firing.
So… what do you think of this article? All InventGeek projects are funded out of pocket and we do our best to freely share what we have learned so you can do your own experiments and build on our work. This can sometime be a costly venture for us; this is why we ask for donations to help InventGeek grow. We ask only that you help and support our efforts.
Related Posts
2 Comments
Where are you putting your alcohol solution? How is it fed to the poofer?
Pour it right down the barrel.