The Meggio Reactor Design
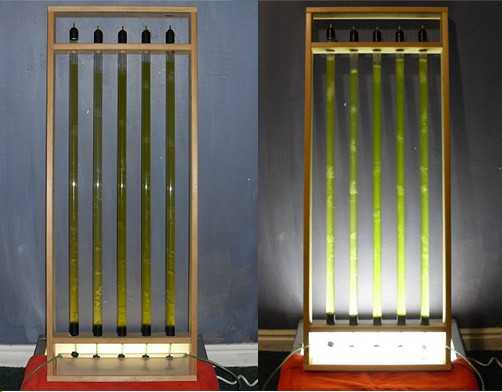
Our algae photo-bioreactor framework is 43 ¾” tall x 17 ½” wide x 2 ½” deep. It consists of 5 vertical 1 inch tubes.
We built this unit for a 2 ½” deep window sill. It is pictured here sitting on a light box.
A bit about this window unit photo-bioreactor design:
We built our algae tubes with PVC end-plugs and hose barbs on the tops. This isn’t actually necessary.
We inadvertently redesigned this bioreactor after we had already reduced and augmented both ends of the pipe.
The new design doesn’t require it. The new design (not shown) doesn’t have any end caps on top, it’s just open ended on top.
One plus to having the tops reduced with fittings is that it cuts way down on water evaporation. Basically, it’s up to you.
YOUR SUPPLY LIST:
- Pine wood for frame (measure window sill if applicable)We chose 2 ½”x ¾” pine so it would fit in the window sill and we liked the look/price of the wood.
- 3 lengths of 6’ long clear acrylic pipe: 1” OD x 27/32” ID (will all be cut in half)
- 6” tall x 15 ½” wide x 3/8” thick plexi-glass sheet to use as a catchment tray (just in case you spring a leak). Our tray is 15 ½” x 2” x 2 ¼” and looks space age.
(Plexi-glass is not a required material, it’s just what we had available. You will need a table saw to cut this.)
- 20’ – Aquarium air hose (aquarium supply) You will need scissors to cut this and a lighter to heat it up for stretching, reaming, or sealing tips.
- 1 – Check valve (aquarium supply)
- 1 Can of Black Tool-Dip (Once can is opened, product ages and hardens quickly. Get all your tool-dip projects done w/in a few days of opening can)
Tool dip is pretty toxic and not required, but good for reducing vibration as well as helping the pipe bottoms be water-tight.
- 5 – T-fittings (from drip-line irrigation supply section at Home Depot)
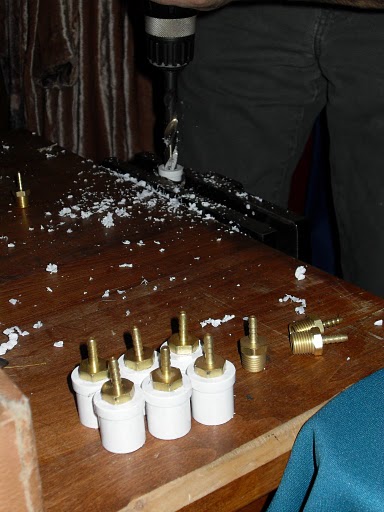
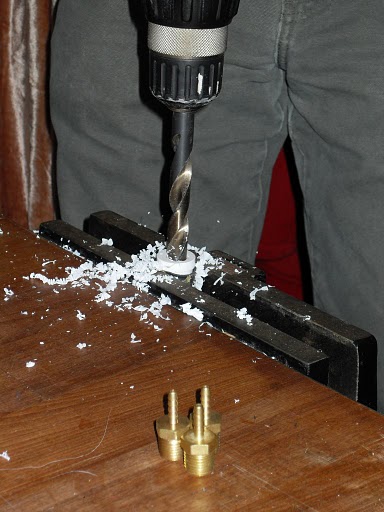
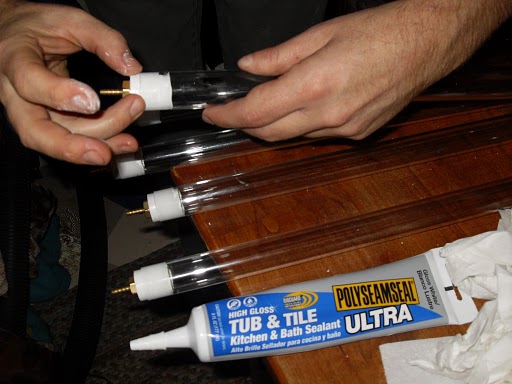
- 5 – ½” PVC end-plugs – PICTURED (10 if you want to cap the tops of the tubes). You will need a drill with these 3 bits: ¼” 5/8” 1 1/8”.
- 5 – Brass hose barb adapters (1/8” Barb x ¼” MIP) – PICTURED (10 if you want to cap the tops of the tubes)
- 5 – 2 gallon-per-hour button dripper PICTURED (drip-line irrigation supply section)
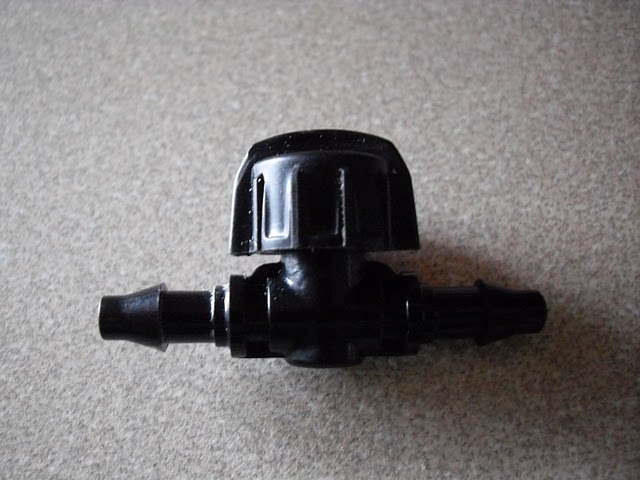
- 1 In-line valve – plastic PICTURED (drip-line irrigation supply section)
- Super glue and 2-part epoxy (clear)
Shopping tip: bring a sample of aquarium air hose AND acrylic tube with you to Home Depot.
Figure 1: PVC plugs and brass hose barbs
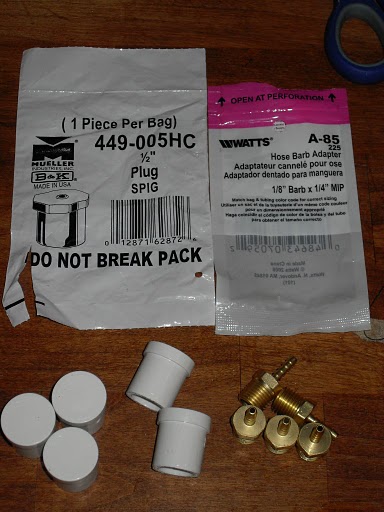
Figure 2: 2-gal per hour button dripper (bottom view)
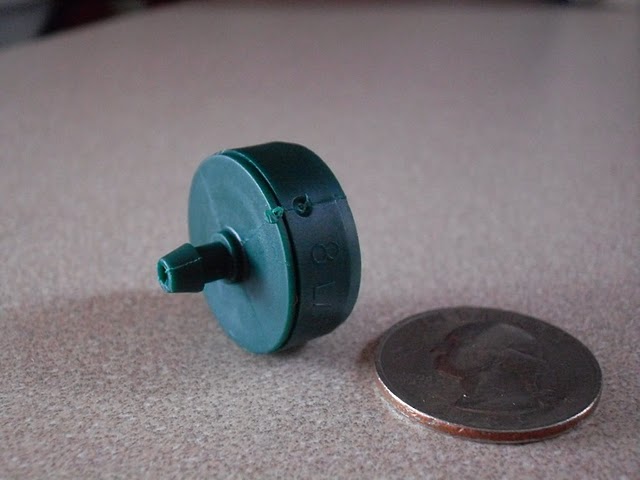
Figure 3: 2-gal per hour button dripper (top view)
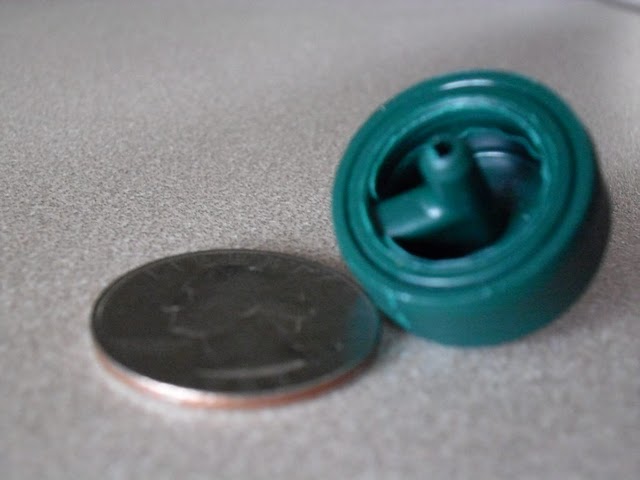
Figure 4: inline valve (plastic)
FABRICATING THE PIPE ENDS:
To make the modified pvc plugs for the end(s) of your bioreactor tubes:
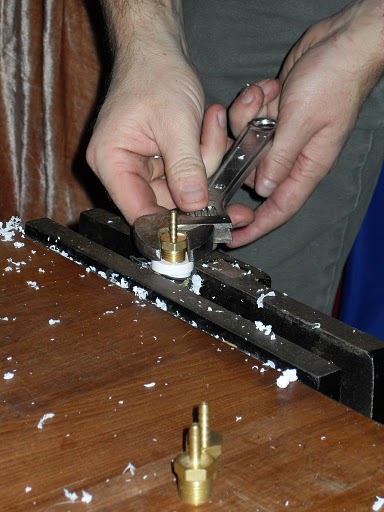
Drill out the ½” pvc end-plugs using a ¼” drill bit.
Then, screw the brass hose barbs into the holes you just drilled.
Make sure they are drilled accurately so the barb is parallel to your pvc plugs’ and pipes’ vertical sides.
CUT YOUR 3 ACRYLIC PIPES IN HALF
Assuming your acrylic pipes are 6 feet long, cutting them in half would give you 6 – 36” long acrylic pipes.
To cut them using a hack-saw would work and be safe.
However, if you want to use a chop-saw to cut them, a rule: the more teeth on your blade the better.
Cut the pipe VERY slowly and be sure to do a test-cut off the end of your first pipe to get the feel for it.
The goal here is to produce 5 – 36” acrylic pipes with one left over.
The left over one is the one you’re allowed to break while practicing your cuts. ![]()
Note: You don’t have to have 5 pipes. That really is up to you.
MAKING THE BIOREACTORS’ BOTTOM-INLETS
(Do NOT use tub and tile caulk for this)
To attach your modified pvc plugs into the bottom end of each of your tubes,
Use 2-part epoxy to glue your plugs with barbs into one end of each of your 5 tubes.
VERY IMPORTANT: Use 2-part epoxy NOT tub and tile caulk. Caulk does not work!!! Don’t find out the hard way like we did.
Be thorough when applying the 2-part epoxy to the sides of the modified pvc plugs; this seal is supposed to be water-tight.
Once your 2-part epoxy has cured, it’s time to use the tool dip. You will want to do this outside! (stinky)
To avoid closing off the ends of the pipes with tool dip, we covered the brass barbed tips with 3 inch long pieces of air hose that we had pulled apart over a flame. Explanation: take a 6 inch piece of air tube and hold the center of it over a candle while you pull it apart.
Before your tips cool, use pliers to crimp the stretched out, hot tips closed.
Once the tool dip completely dries and cures, we cut the dipped air hose free with a razor blade.
Tape works too but it’s not quite as cool.
These dipped hose/tape tips can be reused to plug your barbed ends if needed.
WARNING: don’t tool dip both ends of your pipe at the same time.
The tool dip off-gases and will greatly expand inside your closed space which could break things.
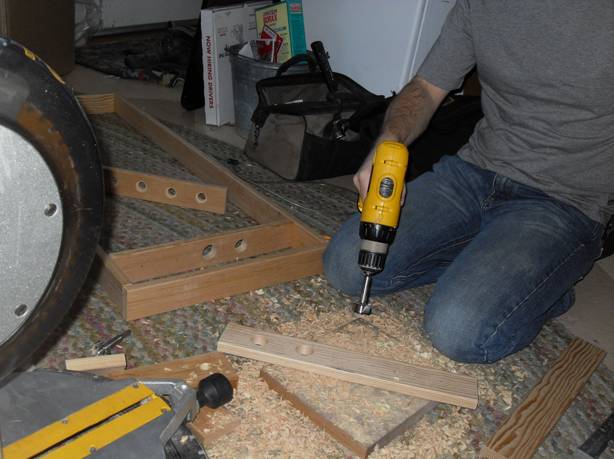
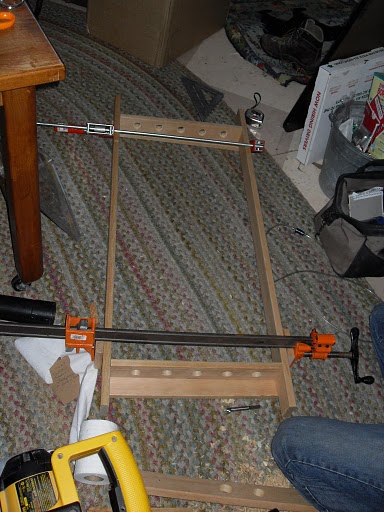
BUILDING A FRAME with 2 HORIZONTAL RACKS
I’m not going to go into a lot of detail about the frame size etc. You get to design this part so your bioreactor frame fits in YOUR window sill or wherever.
This frame is very basic and should be designed to hold your 5 – 36” pipes vertically in your window sill and have two horizontal racks within the framing.
The top rack has 5 – 1 inch holes (evenly spaced or not) which allows the tubes to go through it and stand freely, within the framework.
The bottom rack has a hole with an inset shelf where you can rest the bottom of the tube. This is achieved by using two different sized bits in sequence, small one first.
Check out the pictures to see the details on the holes you will need to drill for your two racks.
You will need two different bits to drill the holes in the bottom rack.
To do this, first drill out a 5/8th” hole for each of your 5 pipes. Then use a 1 1/8” Forstner Bit to drill out an inset shelf (about 1/3rd of the way through) for your pipes to rest in.
Refer to the next 2 images.
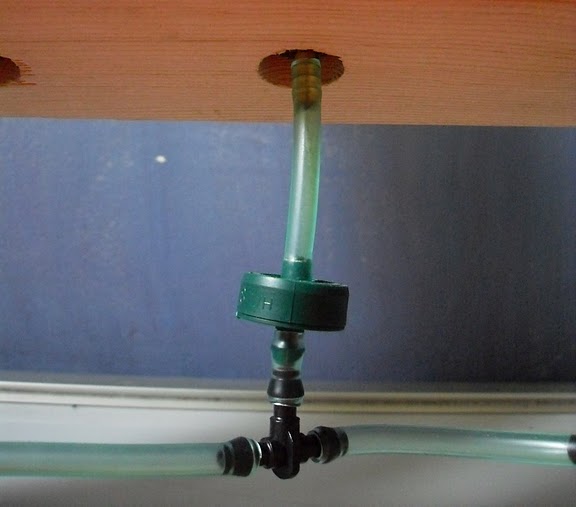
Figure 5: The underside of the lower rack showing the 5/8th”
hole where the brass barb comes through.
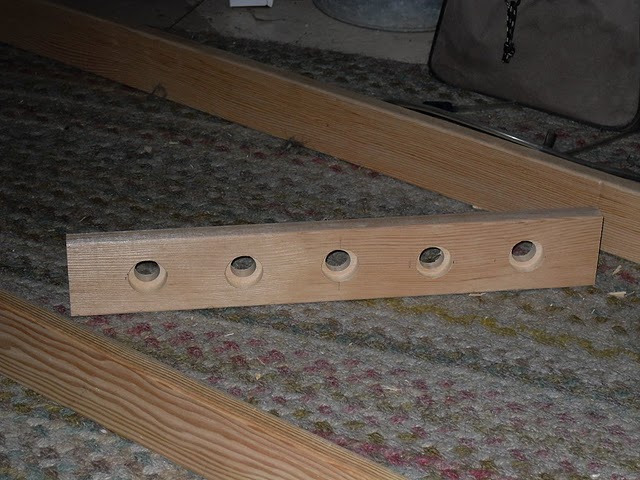
Figure 6: The top-side of the lower rack showing the 1 1/8th” hole where the
1″ acrylic pipe can rest, inset 1/3 of the way into the wood.

BUILD THE AIR INLET MANIFOLD
To build this, you will need air hose, 5 – T fittings, 5 button drippers a check valve and some super glue.

Cut your air hose into the following sizes:
9 – 2 inch pieces, 5 – ½ inch pieces, 1 – 5 inch piece for the hose that leads to the plastic inline valve and 1 piece that will easily reach the air pump when it finds its place on the floor below the window. This piece will get cut somewhere down near the pump where you will install the inline check valve (which protects the pump from algae water backflow).
Begin by attaching 5 T-fittings to 4 sections of 2 inch air hose. As seen across the bottom of the above pictures.
Next, attach the 5 – ½ inch pieces of hose to the open tops of each T-fitting.
Next, dab a bit of super glue on the barbed end of each button dripper as you insert them into the tops of the 5 open ½” air hoses.
Next, dab a bit of super glue on the top end of each button dripper as you attach the remaining 5 pieces of 2” air hose.
If your wood framing is complete, put your 5 tubes in it and then attach the air inlet manifold (pictured above)to the brass hose barb adapters that stick down through the holes.
Make sure all your air hoses fit snugly on to your barbs so there are no leaks!
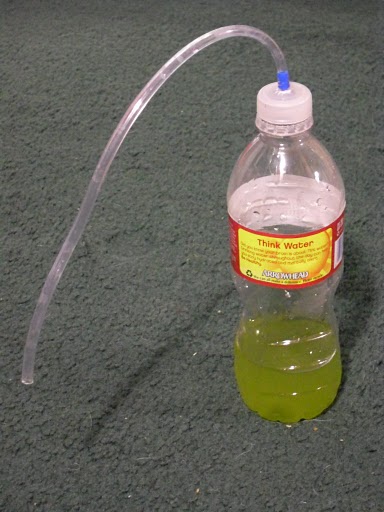
Mix your algae concentrate with urine tainted water (1% urine) to make the growth medium and use a small funnel to fill your tubes.
If you made your tubes to look like ours, you’ll need to make a little filling apparatus out of an
inline air hose connector and a somewhat flexible plastic water bottle to look something like this:
To drain the bioreactor, simply open the inline valve and let it drain into a little bucket.
If you are trying to harvest (thin out) the algae, turn the pump off over night and the thick stuff will drain out first in the morning.
Fill the tubes back up with tap water.
That’s it! Send us your pictures and thoughts!
Related Posts


No Comment