So I wanted to put together a simple example of a bio reactor using simple off the shelf parts and aquarium parts available from nearly any big chain store to make a simple reactor on the cheap. This is the most basic algae reactor design overall and while I used some glass containers for my reactor other ideal containers would be an empty 2 liter bottle or plastic milk jug. This design is really perfect for backup cultures or to keep unique strings of algae’s to start larger reactors off. Using simple off the shelf parts and aquarium parts available from nearly any big chain store these days you can make this simple reactor on the cheap.
Algae Culture:
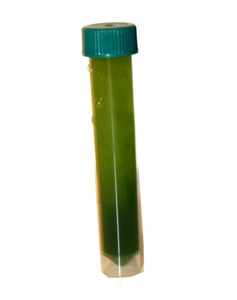
To get your reactor going the most important component will be the algae culture you start with. There are many strains and blends of algae possible and you will need to choose what you want to bloom based on the task for the algae. If you don’t have a friend with a reactor running you can buy specific strains of algae at wards for a fair price. But once your reactor is up and running you should make your blooms available to other like mined peeps.

Contaner:
When it comes to algae it could more or less care less about what type of vessel it’s in. Clear containers are optimal but opaque containers work well also. Two liter soda bottles that are clear are a good candidate as well as used plastic milk jugs. For my reactor I used two glass vases I had laying around. While I don’t use this as my primary reactor I do use it as my backup culture for my strains.
Air Hose:
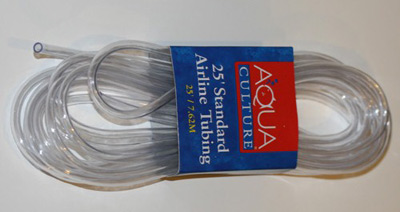
This simple component while not necessary for an algae reactor to run is really crucial in my mind. Aerating algae both agitates it so it gets uniform light exposure as well as introduces more CO2 to the mix. This air hose we picked up from a local aquarium supply store for 2.00USD and is far more than we need for this project (so we have more for future projects). It’s worth noting that this hose doesn’t react well to long term direct sunlight exposure, a simple UV resistant clear coat though makes it last much longer.
Bubbles:
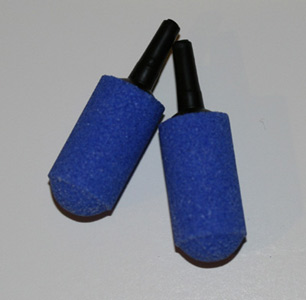
These are simple economical aquarium aerators that we will use in our reactor. It’s good to find something that will make a lot of small bubbles instead of just a handful of big bubbles. Surface area of the air bubbling through the tube is needed to facilitate good gas to liquid absorption.
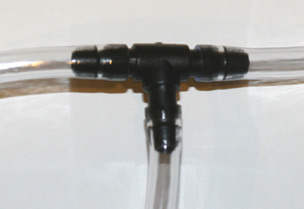
Connectors:
Hose connectors are helpful if you choose to connect several vessels together with one air pump. Unfortunately I don’t know of a cheap non plastic version of these so they will wear out if you reuse them often for projects. This connector is a simple ‘T’ connector and cost about 1.50USD for a set of 2two.

So to assemble our reactor it’s really simple. I simply cut two lengths of hose to drop into the bottom of each vessel for this reactor. Then I simply connected the bubblers and ‘T’ connection together and the pump to the remaining connection on the ‘T’. The air pump I use is a high output continuous use 12V pump; however any aquarium pump will work well for this project.
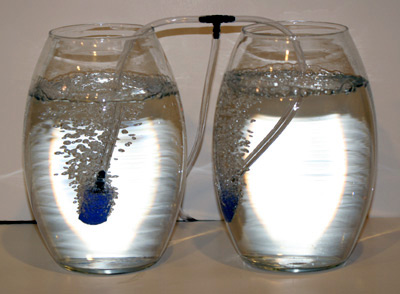
Here we did a test of the pump and made sure we had good airflow. It’s worth noting a potential problem that can arise with the bubblers, some light weight cheap versions will actually float when you turn on the air. The natural instinct is to weigh them down to fix this problem. If you do encounter this problem I recommend against a couple things. Lead weights for example are not a smart idea. You will contaminate your algae with lead, and if you are growing for consumption you can see the obvious problem. Secondly don’t use anything that will rust to attach a weight. I personally recommend a plastic zip tie and a stone as the safest and simplest way to solve this problem if you encounter it.
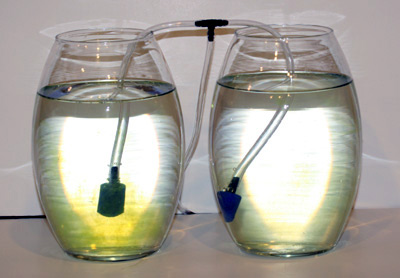
So now we add our algae to our reactor. It doesn’t take much to get this off and running. If you are using city tap water let it sit overnight before inoculating your reactor or you risk the chlorine killing off your algae. There are also several schools of thought for providing nutrients to your algae. Some people think commercial fertilizers for algae is a good method, some people actually promote taking a multivitamin and then using the following urine to fertilize. I’m not a fan of the second personally’ whatever you choose make sure to research it and determine its sustainability.
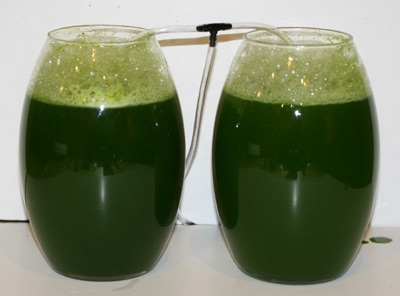
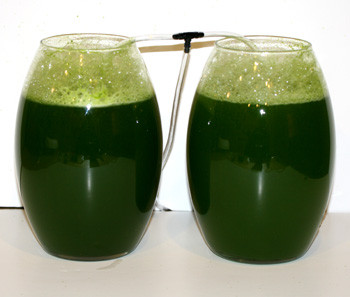
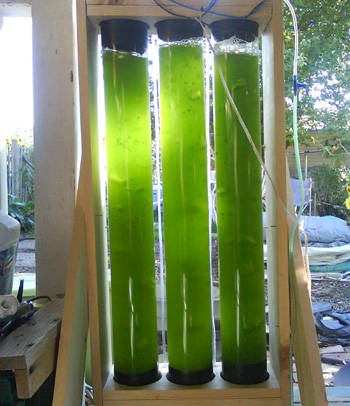
So here is our reactor after running for 2 weeks. We have a thick algae brew that is ready for harvest. You will want to regularly add water set out over night to remove the chlorine to replenish any evaporation or loss from harvesting. There are several ways to put your algae to use and we will discuss that in future articles.
Using the simple techniques you just learned in this project you can start to experiment with larger and larger reactor designs and arrays of reactors. Recommended reading would be a sister project we put together and refined as our second version of a basic array design.


respectfully stated that i really need description of process after harvesting of algae. how can we get fuel after harvesting?
There are a ton of articles on expeller press that are by far the easiest and lease toxic method of extraction for a general user. There are also solvent based extraction methods but you still have to “Crack” the shell of the algae before you can use them.