
The rifle board is a project board a designed 4 years ago for an event that has a seasonal shooting gallery as well as for use in there props and costumes. I have had a few hundred boards sitting on a shelf since and I figure it’s time to share this project with the world. Below you will find our build guide for the board its self and we will publish future articles with its use in a shooting gallery concept, Laser tag, Targets for both and Props. The board is super simple to build and runs the ATtiny Arduino boot loader so coding, modding and experimenting is a breeze with the Arduino IDE.
Now onto the fun stuff! As I said, I have a few hundred boards and full kits lying around. Get those creative juices flowing because we are going to do a build contest with these in the coming months. Once announced you will be able to submit your idea and get free hardware. The person or groups that submit the best projects will get some killer gadgets and prizes so stay tuned for your chance to win!

Our team here at Invent Geek are major believers and supporters in the open source and open hardware movements. Nearly all of our projects are presented in easy to follow how to articles and we share our source files for you to continue tinkering with! Open hardware and software is extremely important because with big businesses patenting everything in sight innovation is stifled and creativity is constrained. Share what we do and help keep ideas, projects and solutions open to the world!
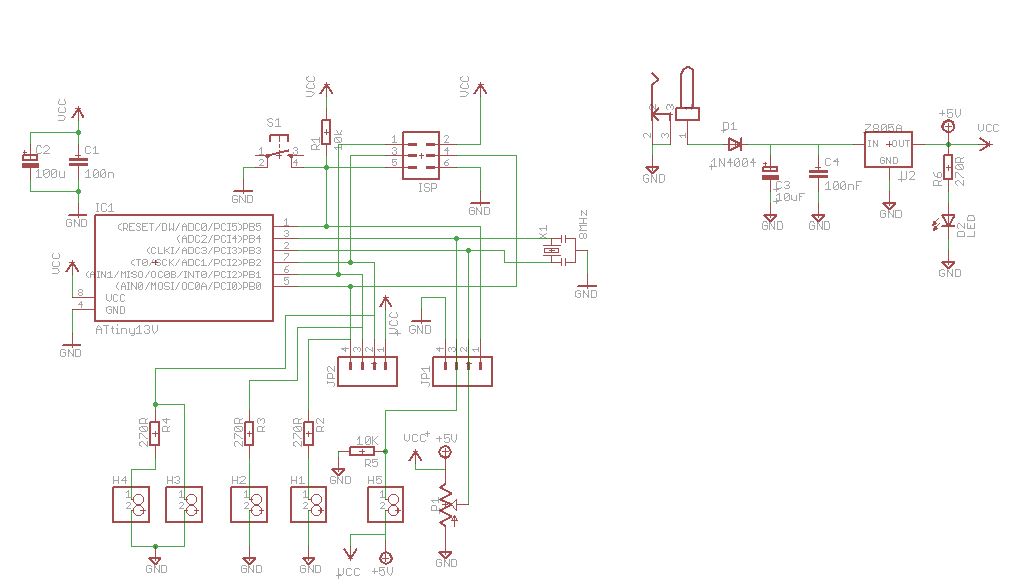
Here we have out circuit diagram for the project. The circuit is very simple and straight forward. There is a bit of creativity built into the design to allow it to be used in several different applications. The onboard potentiometer is an important feature as well as we have used this simple little component to accomplish tasks ranging from changing sensitivity of a sensor to program selection or effect speeds. There is a build in dedicated input and dedicated output channels. Component selection is totally optional depending on what you want this little board to do.
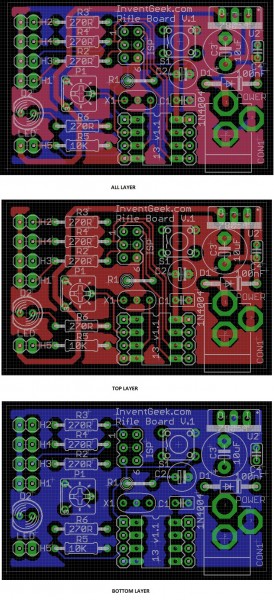
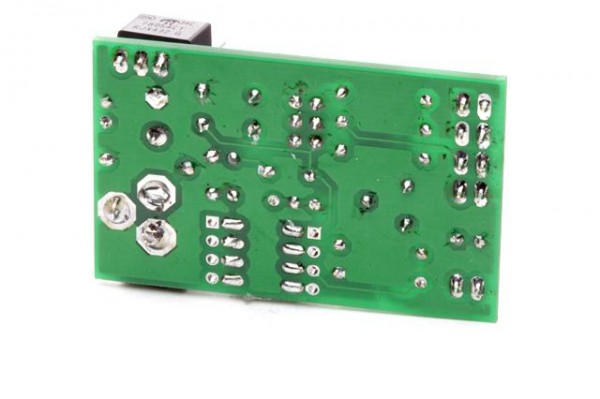
Here you can see the detailed breakdown of this simple boards layers. The board has onboard a Tiny85 MCU, Power regulator and several outputs for your hacking and tinkering pleasure. The board measures only 50mm X 30mm or 2 X 1.2 Inches in size. We have also included header pins for the MCU so you can bypass all the other crap we put on the board and make this baby your own!
Build Guide
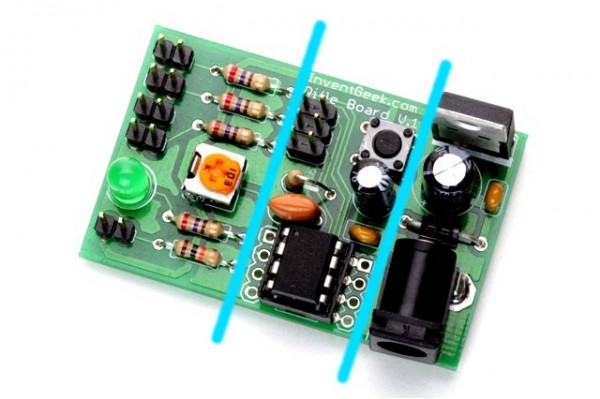
For this build we are going to take a closer look at the Rifle board. The board can be basically broken into 3 separate sections, The Power Supply, The Micro Controller and the Interface. The power supply and micro controller portions of the board are more or less required, but the interface part of the board can be used as is or selectively as the needs changes. For this guide we will be building the entire board so that you can see how it’s done and how we will use it in our laser rifles and prop guns. For our sensors and detectors we will mod things slightly to make the board do our bidding.
Part List
| Component | Quantity |
| Circuit Board | 1 |
| At Tiny 85 | 1 |
| 8 mhz resonator | 1 |
| diode – 1n4004 | 1 |
| barrel jack | 1 |
| ceramic cap 0.1Uf | 2 |
| electro cap large 10Uf | 1 |
| electro cap small 100u | 1 |
| 7805a regulator | 1 |
| push button | 1 |
| 270R Resistor | 4 |
| 10k Resistor | 2 |
| 6 pin header | 1 |
| 2 pin header | 5 |
| led | 1 |
| trim pot | 1 |
| 8 pin dip socket | 1 |


