I have wanted to do some extreme cooling projects for a while now. We have been swamped by a few huge new projects that we are extremely excited for. But I thought this would be a good time for a project of a smaller scale. After surfing the internet finding parts, experiencing the difficulties of getting a keg in Utah, and sweet talking some ebayers I was able to get the parts I needed for a quick build. If you’re experienced with system building or water cooling this will be old hat. If you’re experienced with kegerators and not necessarily computers… Get someone to help you.
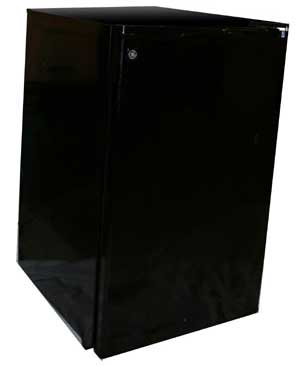
The Mini-Fridge:
We picked up this sleek black mini-fridge at our local home improvement center for about 115.00 USD. Depending on your application you may want to get one of the smaller versions and use if exclusively for water-cooling. The bonus with going with a little larger model is we were able to cut up the racks in the fridge to restore about half of the caffeine storage space next to our computer cooling keg. An added perk of a fully stocked fridge is the cold cans will help the fridge even out its temp as it trys to warm up.
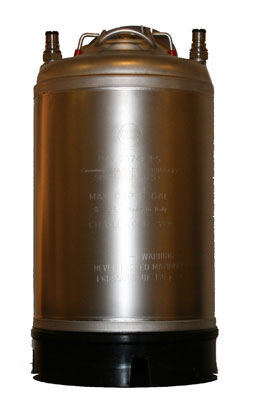
The Keg (AKA Pain in the ass):
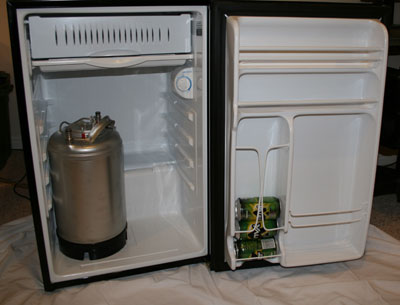
So who knew that Utah had such strong laws regarding alcohol? Well I suppose I did, but I didn’t realize it would make it hard to find what I needed for this project. I ideally wanted a miniball style keg. But… they are hard to get a hold of, even online… So after some research I settled on a nice low profile Cornelius keg. If I had the time I would have matched the fittings on the top of it, but I didn’t have time. So make sure you check into that.
Water Cooling Goodies :
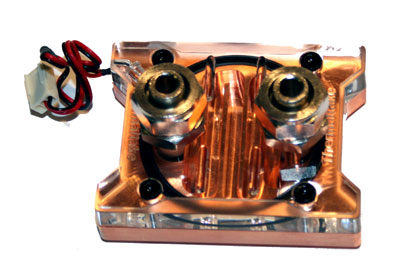
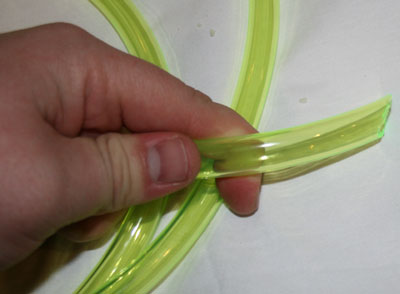
For our project we cannibalized a thermaltake big water cooling kit we had laying around. Basically I used the tubing, pump and mini reservoir, and water block out of the kit. I was sorely tempted to install the radiators in the top of the fridge on the cooling coil to pre-chill the water on its return trip.

Coolent:
For our project we had a bunch of thermaltake premixed coolant laying around. Mixed with some distilled water to stretch it a little. There are several schools of thought regarding cooling mixes, ultimately its up to you to decide what you want to use. But a word of caution… we measured our coolant at 16 degrees f… so if you get it wrong you will have an icecube.
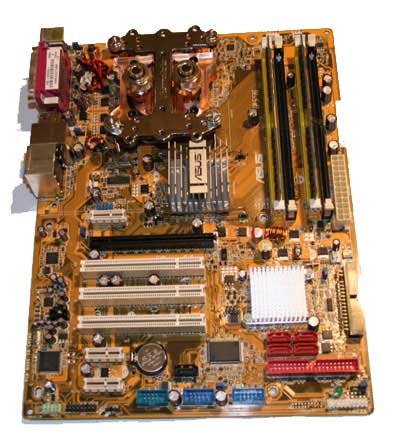
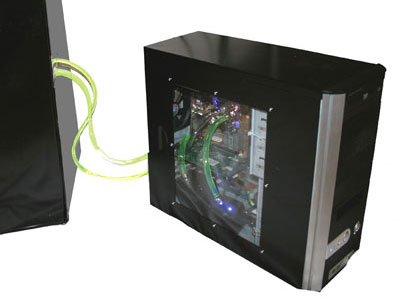
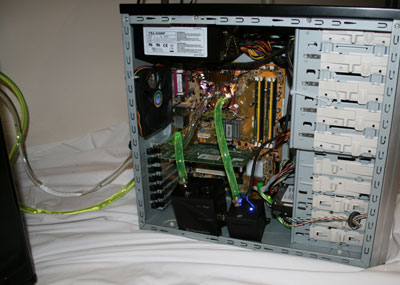
Step one… follow the instructions from the parts. This isent meant to be a primer on water-cooling… there are way to many sites out there with way to many experienced people to make me want to waste my time explaining water-cooling, installation, or tuning. However… if you do succeed in mounting your water block to your motherboard… your about half the way there.
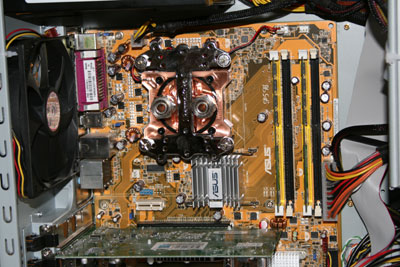
Next you will want to mount your gear in the system your using and prep the case for water cooling hoses. Most kits come with a modified pci slot cover that you pass your hoses through. Some even come with holes knocked out of them ready to rock and roll from the start. In any event make sure your cabling is clean and out of the way.
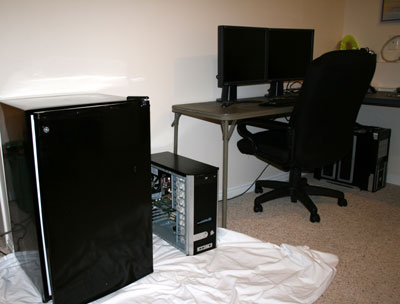
Setting up your space is a important part for any project. I chose the extra effort of a clean space with this project because if something went wrong it should go very wrong. Having space to move quickly and safely is always important.
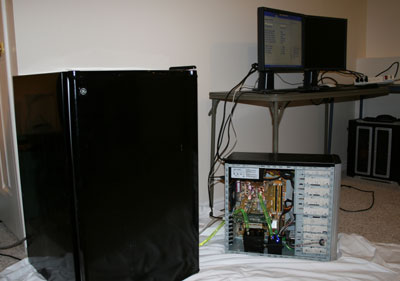
A quick trial fit and you’re ready to go. Carefully consider where you want your tank and any possible obstructions. With my rig I needed to set it up on the left side of the fridge so the door would still close. One other important thing to look for are the coolant lines. It would suck to drill into one of those and put the project on hold as you ventilate, curse and cleanup.
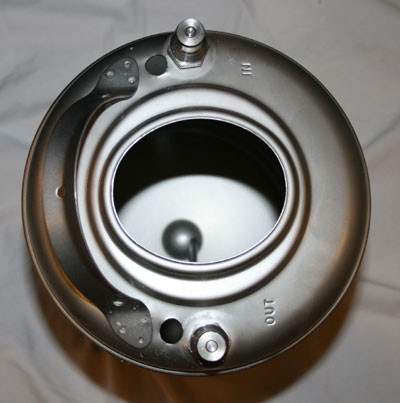
Here is a closer look at the top of our keg. The fittings inner diameter are about 1/4th inch. The coolant tube is about 3/8ths of an inch. Thus restricting your coolant flow. I opted for that reason and the fact I didn’t want to track down fittings to simply drill holes in the top of the keg and silicone them .
One trick that I learned from reading some forums was to cut the hose at a 45 degree angle to encourage a less restricted flow. Worst case if its like rubbing a screw through your hair to lubricate it with the natural oils… or blinker fluid, or blowing bad bits out of a cable then at least it insured the hose wont lay flat on the bottom of the tank and cut off flow.
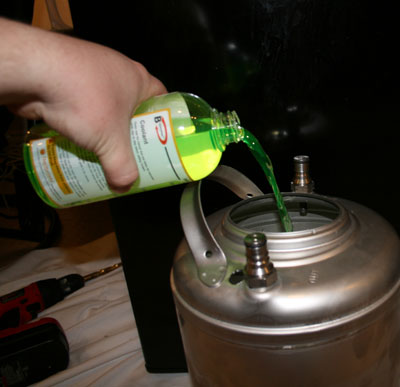
Next up we filled this up with coolant and distilled water. As with the bathroom make sure you aim. Its fairly straight forward unless you emptied the keg your using first.
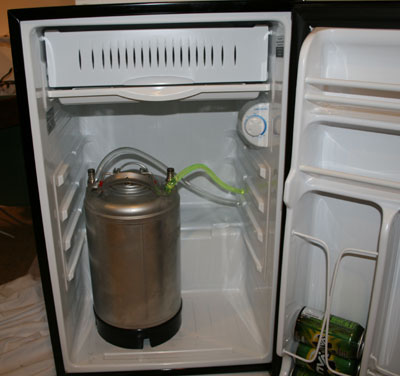
Finally we mounted the filled tank into the fridge, connected the coolant lines, and sealed them. 2 tips we found here. The silicone doesn’t like to cure in a cold environment. Let it cure 24 hours or so before you start to chill the tank. Secondly with the thermostat cranked to the coldest setting allow 24 hours for the fridge to chill the keg as well as the fridge its self. I recommend if you have the ability to add the shelf back in and stock it with drinks that you do so at the first cooling or let it run overnight well stocked.
So after a few quick power on tests to insure both flow and bubbles were worked out I close up the case knowing I did all I could for this project and that it was in the fate of the geek gods and the alignment of Saturn from this point on.
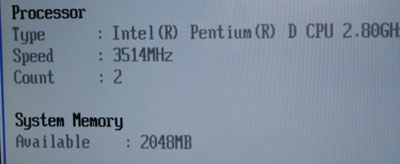
So how did it do? Have you ever seen a giddy geek? Well I will save you all the experience but it goes without saying… I was grinning ear to ear and giggling uncontrollably. I prefer to use the Pentium D line of processors due to their “worst case” nature and then I was even super surprised. I think that the cost effectiveness of this should spark some fun with the enthusiast markets for sure!

After Firing up the system with default settings I jumped straight into the bios to make sure there were no blowup in your face level problems. I was shocked at what I saw. We started off at 12C and came to rest at about 9C after about 20 min of run time. I did find after some testing and tweaking that the colder temps didn’t allow the arctic silver grease to cure as I expected. I speculate that using a typical setup with the radiators and them moving over to the cooled system may allow the compound to cure and thusly make it possible to shave a degree or 3 more off.
Feeling confident I proceeded with the install of windows XP and updates. Still the system ran great and cold. According to the windows based monitoring app during the cpu testing of 3dmark we maxed out at 15C.
Summary / End Results:
So I talked to a buddy of mine who is experienced with over clocking and explained that I would love to really push this system to see what it could do. Later that day he came over and took the helm as I got some cold ones. We found we really had to push the 12V buss and core voltage to make the system run stably again. After hours of testing and tweaking we loaded up crisis and pushed the system as hard as we could without a flicker of problem. Our maximum experienced temp according to the in win app was 22C with profile below. Keep in mind This is a 2.8 Pentium D.


