DIY Air Cooled Mouse Pad
The idea for this project evolved out of necessity. Dan and I are both avid gamers. After a few hours of gaming with our normal high-end mouse pads you get a build up of sweat. The mouse and mouse pad becomes slippery and you start to loose your competitive advantage due to the loss of precision. While there are a couple mice on the market that have small fans in them to dry out your palm, they all have major failings in precision and accuracy. So after some thought and discussion we chose to build out our own custom mouse pad with a blower in it to suck the air down through the pad and away from the gamer’s hand. The result is astonishing!
One of the problems gamers and people that do intensive Photoshop work or 3d work with Maya is the ole sweaty hand syndrome. It’s a vicious cycle, the users hand perspires, then the loose there accuracy and get more tense. Then they sweat some more. Having to stop mid task and wipe your mouse and pad down is a nuisance and doesn’t solve the problem. After some research on the topic it seamed a no brainier to make a mouse pad that sucked warm moist air down and away from the users hand while not being to noisy and yet comfortable enough to use under all circumstances. Selecting cheep and easily accessible materials was a challenge and after some testing we found a great solution so you can still use your super high end mouse and not the cheep ones with fans built in them.
Steel Mesh:
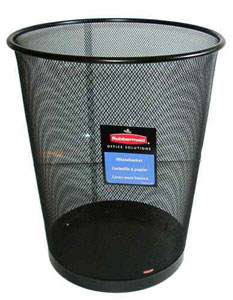
One of the key components of this project is materials that allow for easy airflow through them. Finding a good dense steel mesh for instance is very important to have a firm and solid surface to game on that is still breathable. Trying to stick with materials that are commonly found we will be using a mesh trashcan we found at the local super mart. This Rubbermaid trashcan we picked up for about 9.00 uses a mesh with 1/16″ holes in it and can surprisingly be cut and shaped with a good pair of heavy duty shears.
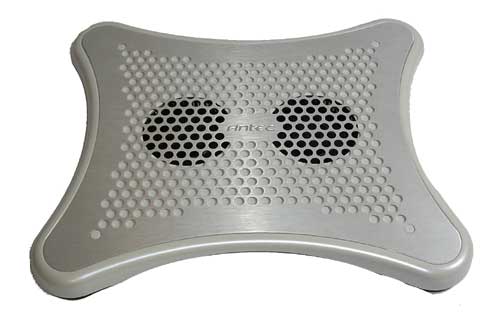
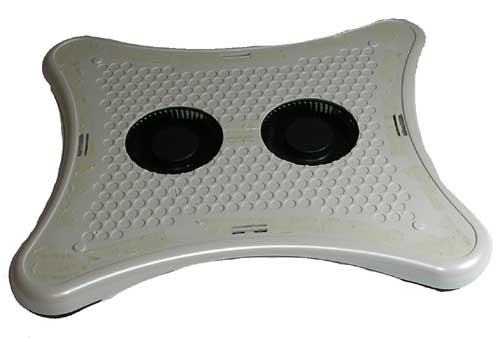
Antec laptop cooler:
A well build system for keeping your laptop cool. Simple construction combined with the ability to plug into your USB port for power makes this a great platform for modding. A 1/8th inch plate of aluminum covers the top and dual blowers move a good amount of air. Total height is about 1/2 inch making it no thicker than other mouse pads out there that light up for instance. Cost is about 25.00 from CompUSA.
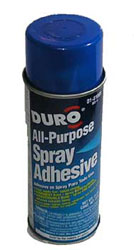
The Glue:
The glue that we chose for this project is a standard spray type adhesive. We chose this brand because after some testing we found it did not react or wick through the material that we chose to cover the pad with. Strong and fast drying it was worth the 5.00 we spent on it.
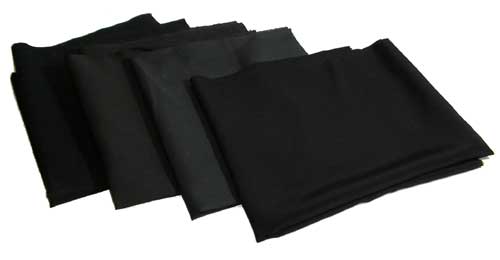
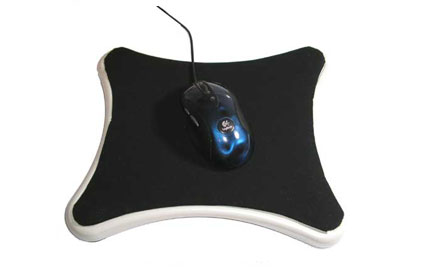
Mouse pad surface:
Time for another trip to the dreaded fabric store. we chose several fabrics to test with for this project. a 100% cotton, a 50% cotton 50% poly blend. A 100% poly and a nylon as well. We found the 100% poly was to our liking more than any other fabric for a few reasons. It has a very tight weave, allowing for better accuracy over all. Additionally we found that it allowed air to travel through it better than the other fabrics other than the 100% cotton. But the cotton left fibers to collect on the optical mouse… 1.50 in fabric from the ole s-mart.
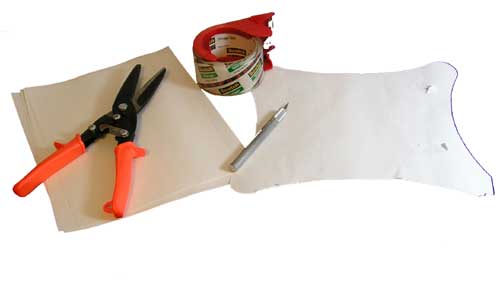
The Misc Junk:
Some of the things that used for the build out were: hot glue and glue gun, a sheet of paper. Some heavy shears and a bit of tape to make a template of the top panel.
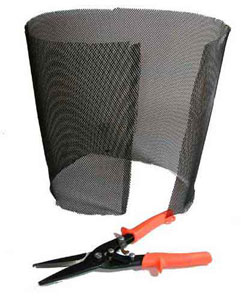
The first step in this project is to dismantle the garbage can so we have some good material to work with. This is a very easy process, just using some heavy shears to cut the frame off the mesh and then split the mesh at the seam. Use caution when messing with the mesh as it will have sharp edges.
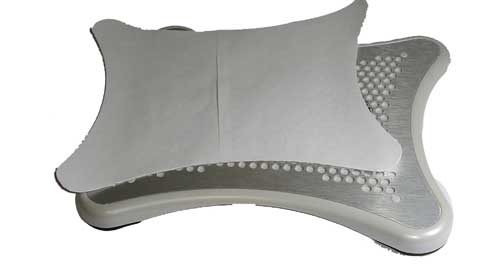
Next up is to make a template of the aluminum plate on top of the laptop cooler. Using some tape and some paper make a template by tracing around the edge where the aluminum touches the plastic. Then cut out the pattern with some scissors. Accuracy here is very important if you want the rest of the project to go easily.
With the top tracing done remove the aluminum panel carefully by taking a small flat head screw driver and prying the panel out. Use caution not to damage the motors or fans as you do this step.
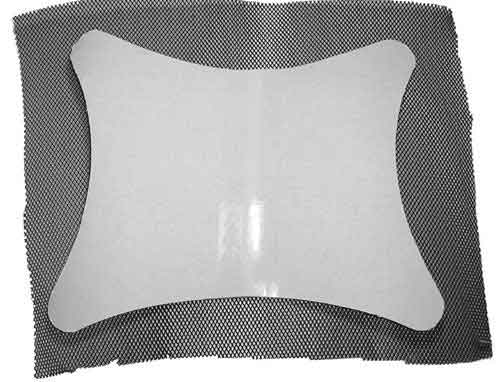
Using your template tape it to a section of the mesh you have cut out. Using your heavy shears cut out a rough shape of the tracing and refine it with a second pass. Doing this extra step will insure there is less extra material to get in the way and should help with a more accurate cut.
Once you have cut the mesh out with the pattern we have made take a pair of pliers and go around the edges and bend any rogue wires flat so as to prevent any pokies in the pad.

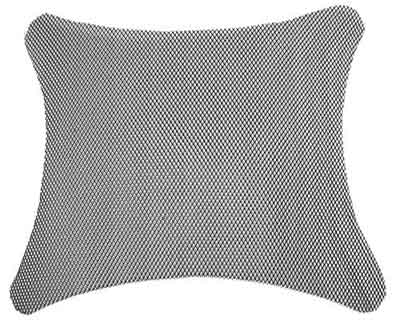
In this step it helps to have a friend to help you out. Take the mesh you have prepared and spray it with a heavy coat of glue. The glue often takes 2 minutes to dry to the touch before it can be bonded. Carefully drape the fabric over the mesh avoiding any creases or seams and keep it tightly stretched. Setting a couple good heavy books on it and letting it dry overnight will help avoided the mesh pattern from coming through the top of the pad.
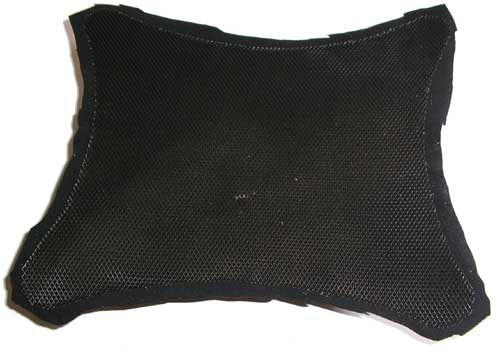
With the glue set and the pad dried, trim around the edge of the pad leaving a 1/2 inch of overhang with the material. Using some hot glue, carefully fold the material over the edge of the mesh creating a nice clean edge to the pad.
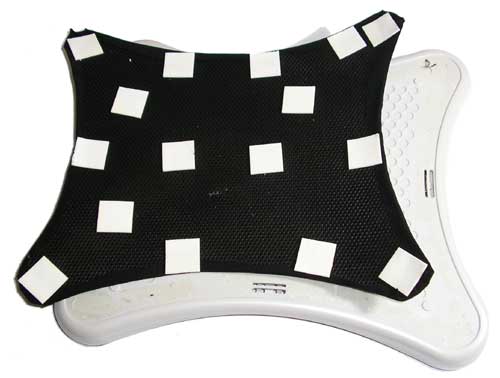
Using some double sided sticky tape that are 1/8th inch tall apply them to the bottom of the pad so as to adhere the new surface to the base. This will create a cavity that the air can be pulled through.
Position the pad surface on the base and press well. Using silicone or hot glue go around the edges to create a sleek and air tight seal.
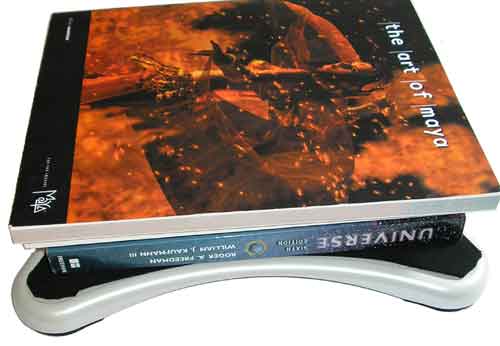
Once again stack some books on the pad and let it sit over night to bond to the materials.
Summary:
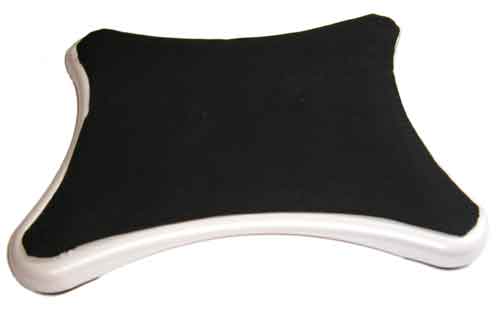
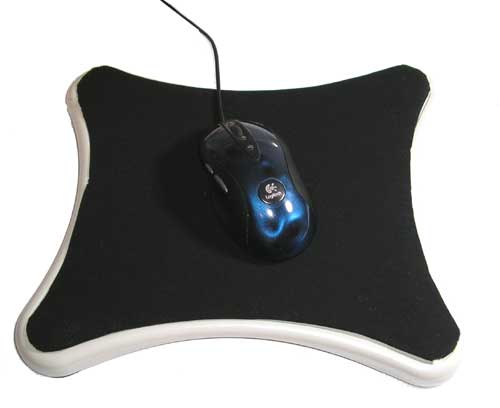
So there you have it, your very own down draft air cooled mouse pad. Weather your at a LAN party gamming your heart out. Or working in Maya into the wee hours on that new model for your game mod, its all the same. This unit works surprisingly well and was very easy to build. I wonder how long it will be until the idea is scalped and some company out there starts manufacturing them.
Related Posts

No Comment