It is quite an experience to be cruising in your J33p (that’s Jeep in L33t for the uninitiated out there) with the windows down (car windows not the OS) knowing two things with absolute confidence. First, you have a car that James Bond would be envious of, ok well maybe not James Bond but Frank Drebin from Naked Gun for sure. Second, the song that you happen to be blasting (White and Nerdy by Weird All) let’s all the homeys know that you are truly l33t.
This J33p has a lot more horse power than just the 210hp engine. With a Core2 Duo, 2 gigs of ram, GPS, a 250Gig hard drive for files and a screaming ram drive for the OS, it is a pretty sw33t ride. Ok I promise to stop writing in l33t now. It is pretty cool to be able to say “Jeep play artist Wierd All” and have it respond. Of course that sounds like what you can get with Sync in the Fords on the market. However, you couldn’t tell a Ford “play DVD”, or “Open GPS” or dictate notes while you drive.
We worked through Logic Supply for this project. They offer a lot of hard to find products that are ideal for geeking out your ride. We installed this system into a 2003 Jeep Liberty. This article will have four sections. 1. Parts, 2. Assembly, 3. Installation 4. Final Summary.
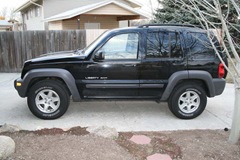
Jeep:
2003 Jeep Liberty. Yeah we made a pretty fun car really awesome in this project. You can find one of these at your local car dealership.
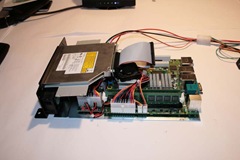
The Case:
VoomPC-2 Automotive Mini-ITX Case. This case, is built from anodized heavy-duty machined aluminum. It is heavy enough to keep it from jostling around, and the case itself works almost as an extended heat sink. The case has room for a slimline CD/DVD drive. It also has front USB2.0 and audio jacks. This is a case that can handle the harsh vibrations and varying temperatures you will find in a car. You could also easily bolt it to the floor of your car with self-tapping screws to deter theft.
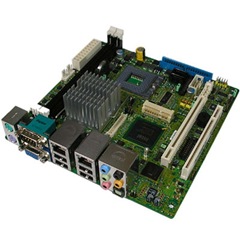
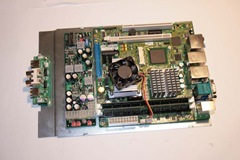
The Motherboard:
MSI Industrial GM965 Core 2 Duo Mobile Mini-ITX Mainboard. With optical out and socket P for sound, you can get great sound quality from this motherboard. It supports the latest Core2 Duo mobile processors and has fuzzy logic systems to keep the system healthy in a wide variety of conditions.
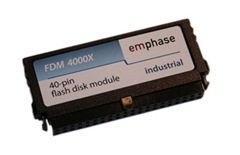
The Solid State Boot Media:
Emphase Industrial 2.5″ ATA Flash Disk 8GB. Clocking in at 4000x, this flash medium is extremely fast and extraordinarily rugged. No moving parts means that you can go four wheeling and jostle the snot out of the thing with no worries. Your OS will boot very quickly and reliably with this drive.
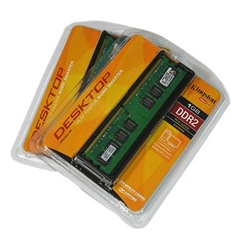
The Ram:
Kingston 1Gb 200-Pin DDR2. We bought 2 sticks to put the total up to 2 GB. 2 GB of ram is the minimum we felt we could put into this systemto get the performance we want out of Vista. Vista is known to be a performance hog, but the improvements made to its media center made Vista the right choice.
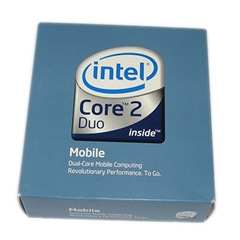
The CPU:
Intel Core 2 Duo 1.8GHz. With this 64bit processor you have a workhorse that can do anything you need. It would be easy to find yourself having too much fun hacking and wardriving with this kind of processing power. Of course you didn’t hear that from us. The Core2 Duo 1.8 is a nice cool running CPU. With a lower air-flow case, we wanted to have a cooler CPU to keep fan noise down.
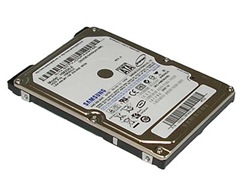
The Mass Storage:
Samsung Spinpoint M Series 250Gig HDD. This will give you enough storage to archive DVDS, and keep quite a music selection on there. You may find yourself looking for excuses to go on a road trip. With your GPS system, you could keep a national database of all the open networks you found in your coast-to coast wardriving spree. How much would a database like that be worth? Google probably would love to add it to their street-view maps… creepy.
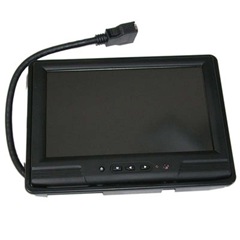
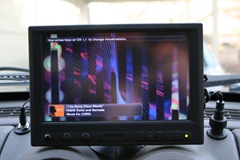
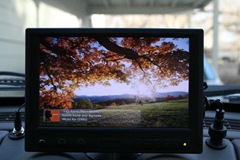
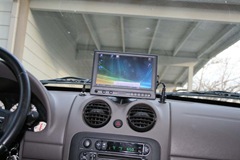
The Display:
The touch screen functionality keeps you from having to deal with a mouse in your car. Being 12 volt, it natively works with your car’s power. The monitor has better visibility in high-brightness conditions than you will find in most LCDs.
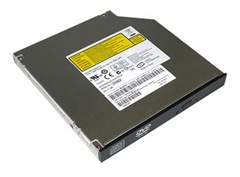
The DVD:
Slimline DVD Drive. The drive we chose can handle every imaginable format of discs short of blue ray and HDDVD. Its 2 meg buffer isn’t huge, but you could certainly burn music for your passengers while you drive. Not that we endorse driving distracted or burning music for your friends.
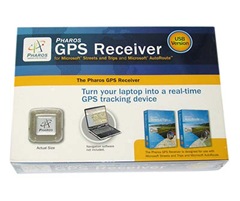
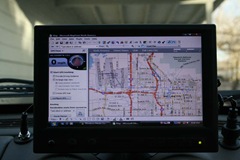
The GPS:
Pharos pB010 USB iGPS Receiver. This GPS has been quite accurate on the road. It acquires immediately and keeps up well when you are driving around. Combine it with map point, and you can get turn-by-turn directions, travel speed, and even find restaurants on the move. You could even tie it into Google Earth if you want.
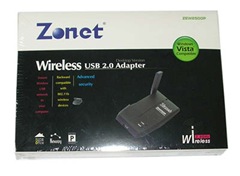
The WIFI:
Zonet 802.11b Usb Wireless. This little thing finds lots of networks that are in the area. I pulled into my garage and had a list of about 50 networks it found on my commute home. I realized right away how much fun you can have with this kind of thing. You will have to download an update to the drivers to make it compatible with Net Stumbler or use a community approved wardriving set up.
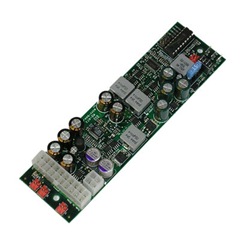
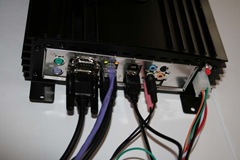
The Power Supply:
Automotive 160W DC-DC Power Supply. A specialized power supply is set up to safely shut the computer down when the main power source is cut off. If you wire it with two hot lines and a switch on your primary line, you can run it off the battery. If you wire it with the primary power coming from the accessory, and a hot for the secondary you will have the computer on whenever your car is running. Wiring it through the accessory is nice, though I do wish I could leave the computer on when I make a quick run into a convenience store or something. The dual hot wiring configuration would let you do that without leaving your keys in the ignition.
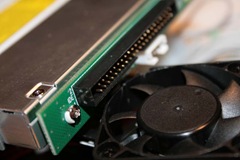
The Drive Adapter:
Slimline CD to 42pin IDE Adapter. We needed this adapter to get our DVD drive to hook up to our motherboard. The adapter resulted in some tight spacing with the CPU fan requiring a slight relocation of the fan.
One note on power tools: use them at your own risk. Be sure to read and understand any and all documentation on the tools you use. No amount of documentation can make up for experience, but there are many people with serious eye injuries from the school of hard knocks. If you don’t know what you are doing, don’t do it, and find someone that can help.
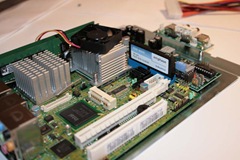
The assembly for this computer is not for the novice. If you are familiar with computer components you will do fine. There is a lot of tight spacing, but the online documentation is very helpful. The adapter on our DVD drive provided the main challenge. We had to mod the fan by cutting off a corner and moving it slightly on the heat sync to get everything to play nicely together. The case was good to work with, providing a slide out tray for all the assembling needs.

Once you get the computer assembled, we recommend you install Windows Vista Premium. Vista is critical if you want to use One Voice for your voice commands. One voice happens to be incompatible with Windows Media Center(XP). Vista has some extra features with Media Center that can be nice to have. In addition, we installed Map Point and Microsoft Office.
You will want to pick up a USB blue tooth transmitter and headset for your voice commands. If you can find one that just acts as a microphone you can avoid any possible difficulties with the head set’s audio taking over for the audio output. Once you get all that up and running you can spend some time talking to your new computer and setting up the voice commands you want to use. If you choose to set up a USB camera as a backup camera, or a usb remote control, setting it up now can be save you some potential aggravation.
For the final assembly, we added a momentary switch to the case and hooked it up to a manual override plug on the power supply. This is nice because the power supply doesn’t always shut down if there is an unsaved document open etc. Being able to manually shut down or power the computer up takes care of those rare occasions when those rare occasions when the power supply doesn’t catch it.
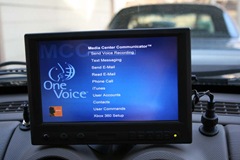
OneVoice:
One Voice is a pretty sweet program. It is recommended you use a headset microphone to get the best voice recognition performance out of it. It would also be a good idea to spend some time with another person driving while you go through the training scripts. That would let you train the system to ignore the background road and engine noise in the car. You will probably want to do most of the set up at the comfort of a desk, and just fine tune it once it is in the car.
It can be a great boost to your confidence to have your car greet you in a self-affirming way. With your new-found confidence, meeting girls online will be easy. Think how impressed she will be when you tell her that you are chatting with her while using her unsecured wireless network! If that doesn’t win the girl over, her hearing your car’s unctuous, slightly mechanical voice greet you by saying: “Hello Danny thank you for turning me on” will certainly do the trick. Then again with a sweet computer that can talk to you like that, who needs to go on dates right?
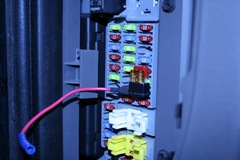
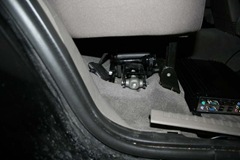
A good installation job for a set up like this is really critical to the ultimate cool factor. Don’t be afraid to remove panels, and fish wires under the carpet. The goal is to keep all your wiring as invisible as possible. In the Jeep we worked on, we had a fuse box under a removable panel on the driver side of the dash. We found an inline fuse that allowed us to insert a new 5 amp fuse inline with an existing fuse location. That gave us the power to our computer tied into the accessory circuit. The power supply is intelligent enough to boot the computer when we turn the key. When you shut down the car, the power supply will shut down safely after 30 seconds without its regular power. From there, the trick was wiring that power to our desired location under the passenger side chair.
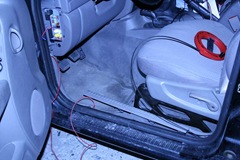
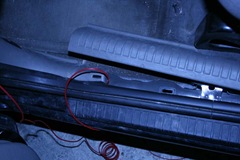
You can run either do a lengthy run under the carpet to keep the wiring completely hidden, or you could do a shorter run that would have a few exposed wires at the very end. The short run goes underneath the driver-side dash with a piece of paneling that removes with just two screws. That gets you into the stereo location on the dash where you could run under the passenger side of the console and pull the wire out right by the passenger side seat. If you are working with a Jeep or other Chrysler/Dodge SUV, there is a good chance you can do a similar run.
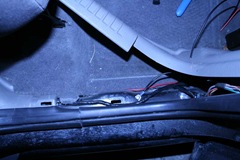
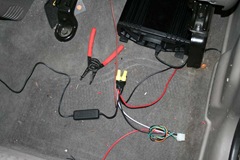
Once you get it back there, you will want to work out the ground for your electrical power. We used a self tapping screw and drilled it into the passenger side frame in a place that will be covered once the panels are back in place. Connect a wire to that screw and then tighten it with a power drill. Run the last wiring from there under the carpet and out an incision under the passenger seat. The power supply also needs a permanent hot line that will give it the power it uses to shut the computer down when the car is shut down. We tapped into the cigarette lighter on our dash. Do a splice on that wire then run it under the passenger side of the console and out. We actually didn’t do that bit of wiring until the next day and did our first power up without that feature. You are now ready to do the final wire splicing for the connection into the automotive power supply.

To secure the computer under the seat, you will want to put a few strips of Velcro on the bottom of the case. This should work for most vehicles. It turns out that the factory carpet for the Jeep is not typical for automotive carpet and has no closed loops. So the Velcro was ineffective for the Liberty.
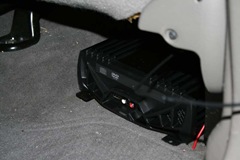
It proved not to be an issue because the arrangement with the moldings under the seat worked out to keep the computer from going anywhere just fine. We chose to place the computer with the face of the computer facing out the back. This worked out to give us a shorter run for our hook ups out the back of the computer to the important areas in the dash, and made for easier access to the dvd drive.
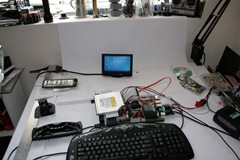
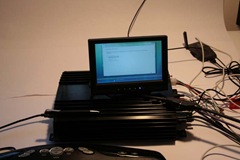
Once you get it to this point you are finally ready for the first power up with the computer. After a long night in the dark, fighting off the shivers from a cold front that moved in, it really felt great to turn the key in the car and watch the computer boot. Never mind the fact that we still haven’t mounted the monitor or even run the wiring for its permanent location.

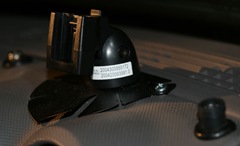
Mounting Your Monitor:
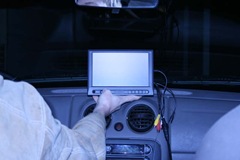
The first order of business for mounting the monitor is deciding where you want it. We decided to put it on the dash right in the middle. This may or may not be legal depending on the cop you talk too, so you will probably want to look into what is or is not allowed in your local area. There are always a lot of creative options for mounting the screen. Depending on the car, you may even be able to go with an in-dash solution, but we went with the location we chose for the simplicity of the install.
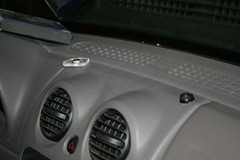
You will need to open up the dash to get access to the space where you will run the video and monitor power. You can run the power to the monitor from the accessory by tapping into the wiring you already ran to the computer. Run that up the same path you took the hot wire for the power supply up to the dash. We drilled two holes into the dash with a 3/4″ drill bit. One for power, and one for the video connection. The mount allows you to quickly remove the monitor for when you are out of the car. Being able to quickly hide the monitor means you have an unassuming mount visible, nothing to invite a would-be thief to break in. We went with the two cable locations to make connecting and disconnecting the monitor as easy as possible.
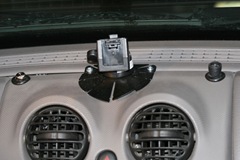
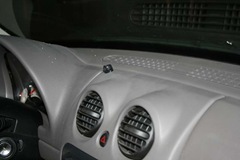
Once you have the wires run and the holes cut for in the dash, you will need some thick grommets to finish the job. The Dash’s plastic is a thicker material so you will need a grommet that matches. Lowes had a good selection of Grommets. Home Depot had only one type, and it turned out to be way too thin to work with the dash. You will need to make a trip to Radio Shack and get a few items. You will want a Coaxial Power Jack, and DC Power Plug (both size N). You will use these to extend the power plug, and have 12 volt power from the accessory line. A few wire splices and crimping and soldering jobs will have you ready to finish things up. If you find you need to keep the wires in place while you make the trip you can always improvise something to keep things from falling through the holes like we did.
To mount the monitor we placed screws in the gap where two panels meet. They augment the double-sided sticky material that came on the mount to keep the monitor securely in place without any rattling.
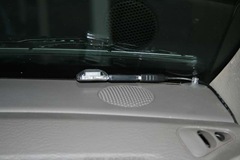
The first item of business is to place the GPS and the wireless networking. The GPS we bought had a long enough connection that we could run it up the passenger side flooring and place it right in the front corner of the windshield. You can run the wiring in the paneling much like we did to run power down the side paneling on the driver side. Use a piece of double sided tape to secure the sensor in place. We like the place we found for it, but feel free to find any place you want to put the GPS. Just make sure it has a straight shot at the open sky. Glass is not a problem, but sheet metal may impede your signal strength.
You don’t have to be as picky with the wireless adapter, unless you are looking for special extended range needs. Maybe your garage is 500 feet away from your house, or your neighbor’s house or the places you should get caught connecting too. We just placed it under the back passenger seat. Again, it is easy to hide the wiring in the panels. That kind of thing should be pretty routine by this point in the set up.

This would be a good time to see if you want to be creative and set up a back up camera. We didn’t bother, but that doesn’t mean it is not an option. We did use a plantronics blue tooth headset with a usb blue tooth receiver. You may also be interested in USB remote controls, tv tuners, electric guitar hookups, usb cassette tape players, game controllers, external hard drives, or just extending a usb hub for quick thumb drive access.

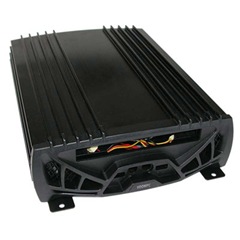
If you are like me, one of the big reasons for doing this is to have that ultimate music collection available to you as you drive, so audio quality is quite important. Unfortunately, the factory cd player in the 2003 Liberty doesn’t have any kind of accessory input available. This leaves you with two options. You can either get one of those fm broadcasters, or you can get a new stereo. We tried the fm broadcaster first and found the first one we bought to be less than ideal. It struggled with the high power output coming from the computer as compared to an ipod or mp3 player. The audio would cut out with any kind of bass, and had lots of static. It left us with the option of buying and trying another broadcaster or looking at getting a stereo. We did a bit of shopping around and found some broadcasters that looked like they would be better quality, but they also turned out to be $15 cheaper than getting a stereo that had the input we needed. So we are not ruling out the radio broadcast solution, but we opted to get a new stereo.
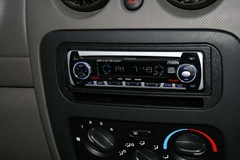
Of course, that initial sticker price on a stereo can be deceptive. After getting the dash kit and wiring harnesses, it turned out to be much more than another fm broadcaster, but we do think that it was worth the price for the higher audio quality. Make sure that the stereo you get has accessory inputs in the back of the stereo rather than the front. That is kind of unusual, but you should be able to find one for a reasonable price. Of course all of that doesn’t matter if the stereo you already have is equipped with the inputs you need.
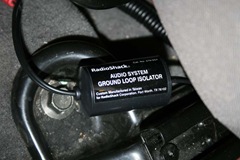
You may find that the space behind the stereo is a bit tight for you to use standard audio inputs. You can find some 90 degree connectors at Radio Shack. They have a low enough profile that you shouldn’t have any problems making everything fit from there. The last thing you may need is a ground loop isolator. The electrical system on a car isn’t grounded like most systems. This means that electrical devices like the alternator can introduce noise into your audio. It is a funny buzzing noise that gets higher and louder as you rev the engine, not exactly something that accentuates your music, unless of course it happens to be Neil Diamond or Michael Bolton. A ground loop isolator will take care of that problem for you. Again, Radio Shack has one that is already put inline on your audio cable. With all of that hooked up you are ready to close up your dash for the last time. That can be a really good feeling.
Summary / End Results:
With the right parts available through logic supply, some manual labor, and a power drill you can make your car into something unlike anything else on the road. It is quite a fun experience to have your entire music library, an archive of movies, and gps all at your voice command. Some people brag up the spinning rims on their car. Others however can take pride in the fact that their “rims don’t spin. To the contrary they’re quite stationary.” This project just goes to show that no spinning rims are necessary to make your car the coolest one on the road. So go ahead, sit down in your car and say it with pride: “Jeep play song White and Nerdy.”